
📋 Prerequisites
Before creating rotations, ensure that:
-
✅ Teams and personnel are already set up.
-
✅ Work packages exist for linking rotations.
-
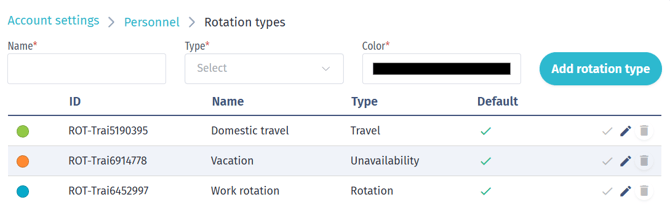
✅ Rotation types are configured in Account Settings → Personnel → Rotation Types.
-
Example: Absence, Travel, Vacation, Work Rotation.
-
You can add new types (e.g., Sick Leave) with a custom color for clarity.
-
If logistics rotations are used, configure logistics rotation types separately in Account Settings → Logistics → Rotation Types.
-
- ✅ Users have the required permissions:
- Access, Read, Update in Account settings to configure rotation types.
- Access, Read in Personnel to open and use the Resource Calendar.
- Access, Read, Update, Delete in Personnel to create, edit, move, resize, or delete personnel rotations.
- Access, Read, Update, Delete in Logistics to create, edit, move, resize, or delete logistics rotations.
- Access, Read, Create, Update, Delete in Personnel to create, or delete rotation templates.
📅 Accessing the Resource Calendar
-
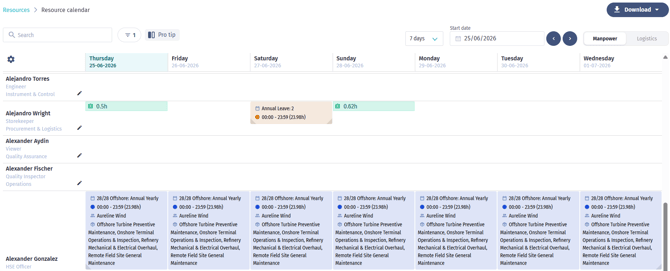
Go to Resources → Resource Calendar.
-
Use the Manpower / Logistics switch to view personnel or logistics resources.
- You will see a list of all available people (manpower or logistics resources).
➕ Creating a New Rotation
-
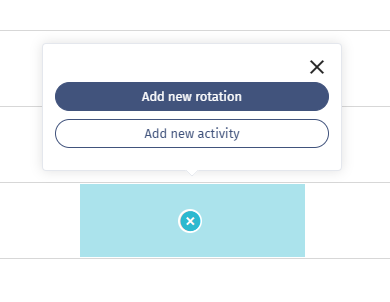
Select a resource and click the + on an empty calendar slot.
-
Choose Rotation to create a new rotation.
-
For personnel rows, you can also choose Activity. Activity creation is not available for logistics rows.
⚙️ Configuring a Rotation
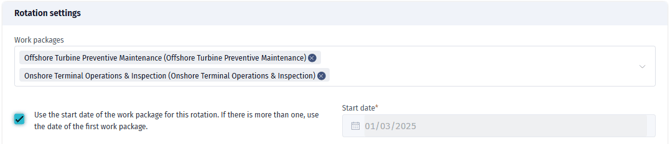
Work Package Association
-
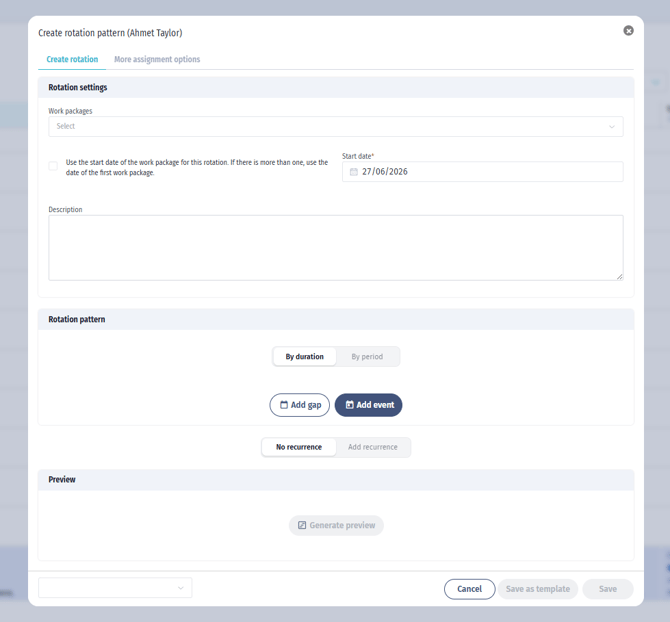
Link rotation to one or multiple work packages.
-
If multiple work packages are linked and Use work package date is selected, the start date is taken from the first selected work package.
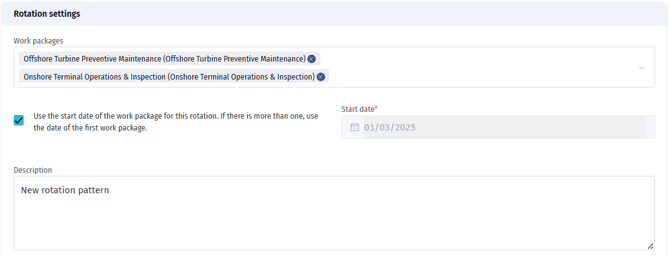
Description
-
Add context (e.g., “Two weeks offshore, two weeks onshore”).
Pattern Definition
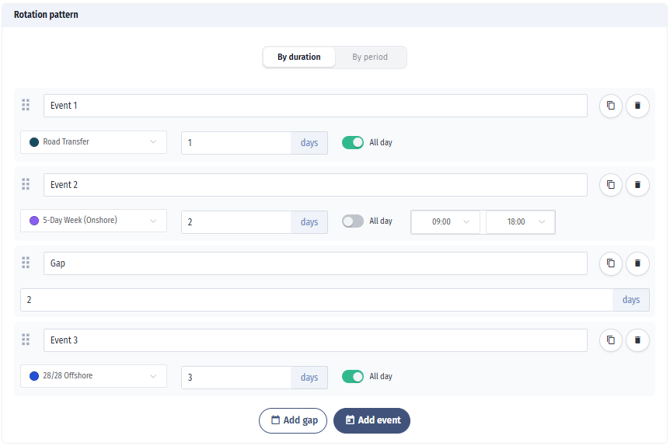
Use blocks to define rotation sequences:
|
Example |
Pattern Setup |
|---|---|
|
Simple cycle |
Work → Day Off → Repeat |
|
Offshore |
14 days Work → 14 days Off |
|
Complex |
Travel → 2 days Work → Gap → 2 days Work → Travel |
Options:
-
Use By Duration or By Period to define the rotation pattern.
-
Use By Duration when defining event lengths, such as 14 days Work followed by 14 days Off.
-
Use By Period when setting exact date ranges.
-
Use gaps to model non-working days or breaks within a duration-based pattern.
Time Settings
-
Set as All Day or define custom hours (e.g., 08:00–16:00).
Repetition
-
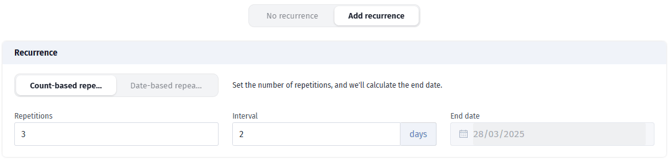
Choose No Repeat for a one-time pattern, or Repeat Rotation to repeat the pattern.
-
Repeated rotations can repeat by count or until a selected end date.
-
Use the interval field to add days between each repetition.
-
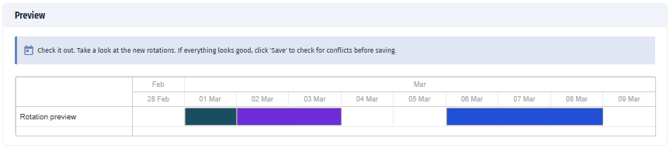
Always generate or refresh the preview before saving to confirm the pattern.
Rotation Patterns: Understanding Gaps and Intervals
How Gaps Work in Repeating Rotations
When creating a rotation pattern with repeating schedules, there is an important distinction between gaps within the pattern and intervals between repetitions.
Gap Events vs. Repetition Intervals
Gap Events are placeholder events representing non-working periods (e.g., rest days, breaks between shifts) within a single pattern cycle.
Repetition Intervals define the number of additional days between each complete repetition of the entire pattern.
Critical Behavior: Patterns Ending with Gaps
You must specify a repetition interval value when your pattern ends with a gap event.
OR
You could also use the interval input instead of finishing with a gap, if the goal is simply to create spacing between repetitions.
👉 Always click Generate Preview to confirm the pattern.
👥 Assigning to People & Teams
-
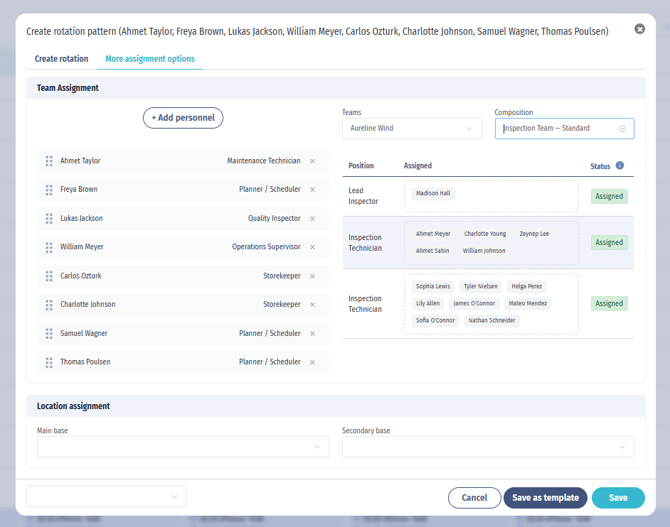
Go to the Assignment Options tab.
-
Use Add Personnel to add people to the rotation.
-
Select a team and composition if the rotation should be linked to team positions.
-
Drag personnel into the relevant team positions as needed.
-
Assign locations using Main Base and Secondary Base.
-
Click Save when the assignment is complete.
⚡ Conflict Handling
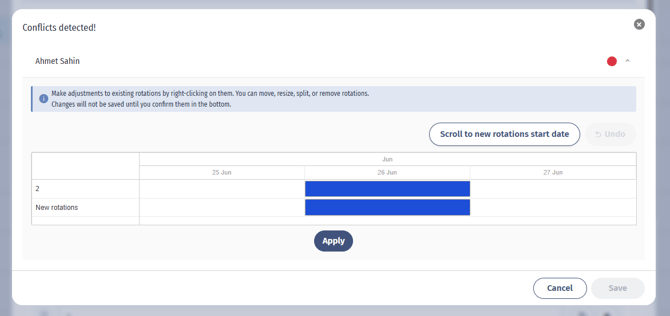
If the new rotation overlaps with existing rotations, the system opens conflict resolution before saving.
Resolve conflicts using the available actions: Move, Resize, Split, Remove, or Remove all rotations.
Apply the resolved state for each affected person, then save.
-
During Creation
-
After hitting “save” the system flags conflicts immediately.
-
Options: Move, Resize, Split, Delete.
-
-
After Creation
-
Conflicts appear in the calendar.
-
Right-click the conflicting rotation to resolve.
-
After rotation edition step the system drives the user to the conflict resolution
-
Options:
-
Split rotation
-
Delete before/after
-
Keep as is
-
Replace with new
-
-
🖊️ Editing Rotations
-
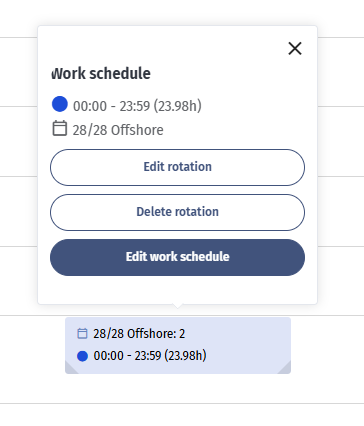
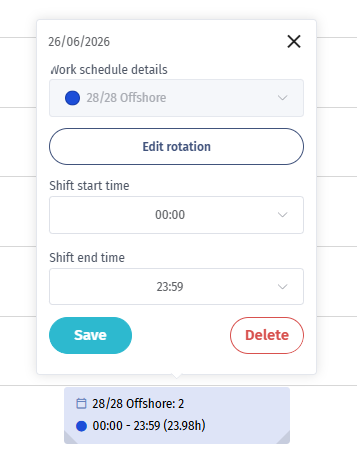
Edit Work Schedule (single event): adjust or delete one day.
-
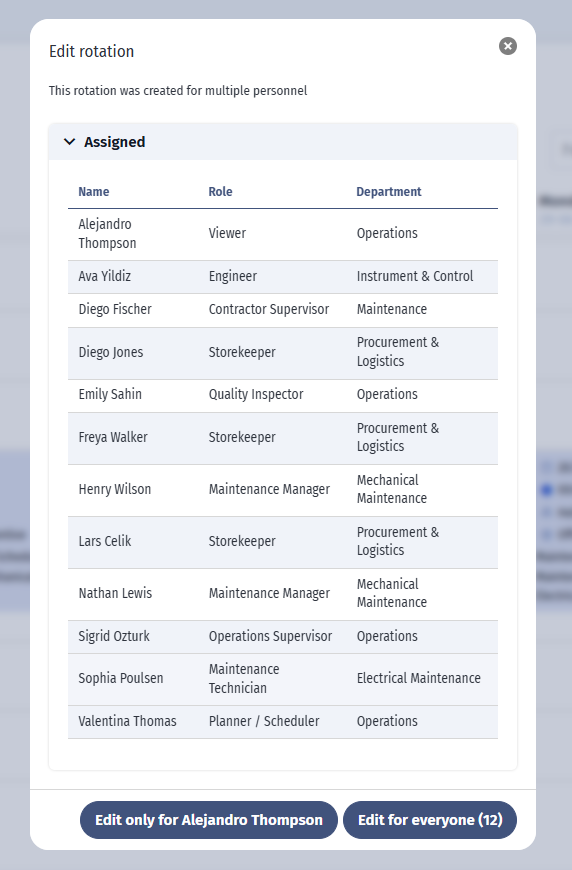
Edit Rotation (pattern level):
-
Apply edits to all assigned people or only one.
-
⚠️ If you reapply the pattern, any manual edits (e.g., deleted days) will reappear, similar to recurring events in Outlook/Google Calendar.
-
🗂️ Saving & Reusing Templates
-
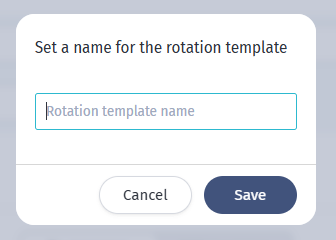
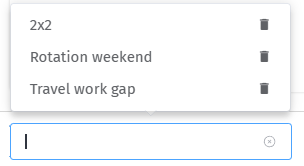
Save any rotation as a Template.
-
Use templates to quickly apply standard rotation patterns.

⭐ Key Benefits for Customers
-
Faster creation and replanning of schedules.
-
Ability to define complex rotation patterns.
-
Improved conflict resolution.
-
Increased flexibility with templates.